Spring is coming. Really it is, though I am writing this during the biggest snow storm of the year so far. I am in the northern Midwest of the US so we can see snow until May. So more great weather to look forward too.
This is for future me and you to think about:
Imagine this: The birds are chirping, the sun is (sort of) shining, and your winter gear is still taking up prime real estate in your closet.
It’s time to swap out those heavy coats, snow boots, and scarves for lighter jackets, gardening tools, and spring essentials. But before you start hyperventilating at the thought of another seasonal chore, let me tell you: this doesn’t have to be a nightmare.
As someone who cut their teeth on 5S and Kaizen projects in manufacturing (yes, I was that guy with the clipboard and a caffeine addiction), I’ve learned a thing or two about efficiency. And guess what? Those same principles can help you tackle your seasonal swap like a pro.
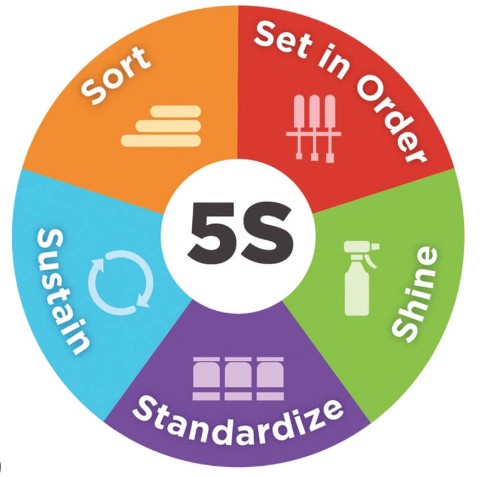
Step 1: Sort – Because Not All Winter Gear Deserves to Live
The first step is to review your winter items before storing them. Sorting ensures you’re not holding onto things you no longer use or need. Think of it as a breakup with your winter gear—some items are worth keeping, but others need to go. (And let’s be honest, some of them should’ve been dumped years ago.)

Evaluate Winter Gear:
Take a look at your winter clothing, footwear, and accessories. Ask yourself:
- Did I wear this at all this winter? (If not, why is it still here? Are you running a museum?)
- Does it still fit? (Be honest. That sweater from 2003 isn’t fooling anyone.)
- Is it still in good condition? (Hint: If it’s held together by duct tape and hope, it’s time to let it go.)
If the answer is no, it’s time to say goodbye. Don’t worry, the winter gear won’t cry. Probably.
Create Categories:
Divide items into piles:
- Keep: Items you wore regularly and are still in good shape. (Aka the MVPs of your winter wardrobe.)
- Donate/Sell: Gently used coats, boots, and accessories that could benefit someone else. (Because one person’s “meh” is another person’s “heck yeah.”)
- Discard: Items that are damaged, stained, or beyond repair. (Pro Tip: Check if your local recycling center accepts textiles.)
Don’t Forget Gear and Tools:
Review winter sports equipment or seasonal décor. If something hasn’t been used in years, consider giving it a new home. (Or just admit you’re never going to take up snowshoeing and move on.)
Pro Tip: Make a list of items you’ll need to replace next winter (like gloves or a new snow shovel) so you can shop offseason sales. Winter items in late February and March can often be 50% or more off.

Step 2: Set in Order – Label Like Your Life Depends on It
Once you’ve sorted, it’s time to organize and store your winter items properly. This step ensures everything is easy to find when the cold returns next year. (And it will. Because life is cruel like that.)
Use Labeled Bins or Vacuum-Sealed Bags:
- Store clothing in vacuum-sealed bags to save space and protect against dust and moisture. (Bonus: It’s oddly satisfying to watch the air get sucked out. )
- Use clear plastic bins with labels for larger items like boots or blankets, so you can easily identify what’s inside. (Because “Miscellaneous Winter Crap” isn’t a helpful label.)
Group Items by Type:
- Keep coats, scarves, and gloves together. (Because nothing says “I have my life together” like a perfectly organized winter accessories bin.)
- For décor, store items by season (e.g., “Winter Holidays” vs. “Spring”).
Store in the Right Location:
- Place bins with winter items in harder-to-reach areas, like the top of a closet or back of a storage room. (Out of sight, out of mind—until next year, when you’ll inevitably forget where you put them.)
- Reserve easily accessible spots for spring and summer items you’ll use frequently, like rain boots or garden tools. (Because nothing says “spring” like realizing you stored your rain boots behind the Christmas tree.)
Pro Tip: Add a small sachet of lavender or cedar blocks to your bins to keep items fresh and deter pests. (Because moths are the real villains of this story.)
Step 3: Shine – Because Dust Bunnies Are Not Decor
Before storing your winter items, take the time to clean and refresh your storage areas. (Yes, this means actual cleaning. I know, it’s the worst.)
Clean Surfaces:
- Wipe down shelves, vacuum closets, and dust storage areas. A clean space protects your items and makes retrieval easier later. (And by “later,” I mean next year when you’re frantically searching for your snow boots during the first blizzard.)
Check for Repairs:
- Inspect bins, shelves, and storage areas for signs of wear, such as cracks in plastic containers or moisture buildup. Fix these issues before storing items.
Deep Clean Winter Items:
- Wash or dry clean clothing before storing it to prevent odors or stains from setting in.
- Clean boots and winter gear to extend their lifespan. (Pro Tip: If your boots are beyond saving, just buy new ones. You’re worth it.)
Step 4: Standardize – Make It a Habit
Step 4: Standardize – Make It a Habit (Because Chaos Is Overrated)
Alright, here’s where we bring in Standardize, the fourth step of 5S. The goal? To create a system so consistent even your cat could follow it. (Okay, maybe not the cat. Cats are anarchists.)
Create a Standard Process:
- Write down the steps for your seasonal swap. Yes, actually write them down. I know, it feels like overkill, but trust me, Future You will thank Present You when they’re not digging through 17 bins looking for that one scarf.
- Share this process with your family or roommates. If they’re anything like mine, they’ll ignore it completely, but at least you can say you tried. And when they inevitably ask where something is, you can smugly hand them the checklist and say, ‘Figure it out.’”
Use Visual Aids:
- Create a simple checklist or flowchart for your seasonal swap process. Think of it as a treasure map, except the treasure is your sanity.
- Post it in your storage area or save it digitally for easy reference. (Pro Tip: Laminate it if you’re feeling extra GenX.)
Set Up Zones:
- Designate specific areas for winter and spring items (e.g., “Winter Zone” vs. “Spring Zone”). Use color-coded labels or signs to make it clear where everything belongs.
- If your family still can’t figure it out, consider adding neon arrows or a foghorn.
Pro Tip: Use a label maker to create clear, consistent labels for your bins and zones. Because nothing says “I’ve got my life together” like perfectly aligned labels.
Step 5: Sustain – Don’t Let the Chaos Win (Again)
The final step is Sustain, which ensures your system stays effective over time. This is where most people fail, but not you – because you’ve been through worse. (Remember dial-up internet?)
Schedule Regular Check-Ins:
- Set a reminder to review your storage system every month. Call it “Closet Therapy” if it makes you feel better.
- Toss or donate items you no longer need, and reorganize as necessary.
Involve Your Household:
- Make seasonal swaps a family activity. Assign tasks to each person (e.g., kids can sort their own winter gear). If they complain, remind them who pays for Wi-Fi.
- Lead by example—show them how much easier life is when things are organized.
Celebrate the Wins:
- Reward yourself (and your family) for sticking to the system. I recommend ice cream for both you and the kids.
- Take before-and-after photos to see how far you’ve come. Bonus points if you post them on social media to show how this project was so much better than going to see the latest GenX rocker looking to cash in on nostalgia concert – looking at you Billy Idol.
Pro Tip: Keep a small notebook or digital file to track what’s stored where. This will save you time and frustration next season. Or, you know, just wing it and hope for the best. You’re a GenXer—you’ve survived watching the last episode of “Dinosaurs”.
Maximize Space with Lean Principles
Lean principles focus on efficiency, and they’re perfect for seasonal swaps. Use these ideas to optimize your storage:
Vertical Storage:
- Install shelves or hooks to free up floor space.
Stack Strategically:
- Heavier bins go on the bottom, with lighter items stacked on top.
Zone Your Storage:
- Keep frequently used items (like rain jackets) within arm’s reach, while less-used items (like snowshoes) are stored higher up or farther back. Way in the back…
Pro Tip: Keep a list of where items are stored to avoid the frustration of searching for them later. A simple digital or paper inventory can save time next season.
5-Minute Kaizen Daily Improvements
Here are a few quick, Kaizen-style tweaks to keep your seasonal swap on track:
- The “One-Bin Rule”: Spend 5 minutes sorting one bin or drawer of winter items.
- The “Daily Declutter Dash”: Toss or donate one item you no longer need.
- The “Label Sprint”: Label one bin or bag with its contents.
- The “Zone Check”: Spend 5 minutes reorganizing one zone (e.g., the coat closet).
- The “Inventory Update”: Add 5 items to your storage inventory list.
Final Thoughts
Spring is nature’s way of hitting the reset button—so why shouldn’t your home get the same treatment? (Besides, your closet is currently a shrine to winter gear you haven’t touched since the Obama administration. It’s time for an intervention.)
By following these steps, you’ll not only make the seasonal swap easier but also set yourself up for success next winter. And if all else fails, just remember: you survived the 90s. You can survive this.
“Go forth and declutter, you glorious mess”
And if you need a little extra motivation, reward yourself with a treat. I recommend a cookie; a macadamia, white chocolate chip cookie. Mmmm…
Stay cynical (but organized),
Tim
The DeClutterPunk | Because Good Enough is the New Perfect
